Thursday, September 10, 2015

Beltline near Boulevard

More photos from the future Atlanta Beltline between Confederate Avenue and Boulevard.

First, we have a different view of the Confederate Avenue trestle.


Another one of those mysterious steel boxes.


This is apparently a rest stop for track-walking derelicts like me.


I think this an indicator for a rail switch. 


Evidence of a serious accident.


Wednesday, September 9, 2015

Carport grows in back yard

The carport we disassembled in a few hours is taking much longer to put back together.

Here, the downhill side is raised and leveled, but it's still not at the same elevation as the higher side. I no longer care.


And here, the frame is complete. 
Is it level and plumb? No, but it meets my minimum expectations.


Next, the roof.


Monday, September 7, 2015

More Beltline photos

I spent another morning walking the abandoned rails on the unfinished (actually un-started) Beltline route. As usual, I found lots of interesting (to me) things to photograph.


Looking north toward Glenwood
Kudzu and concrete


Rail clamp

Cross ties versus Kudzu: Kudzu wins.


Signal flag ladder


Sand was dumped from the bottoms of  loaded hopper cars into this pit. The sand traveled by underground conveyor to a large open area where it created mountains of sand next to Berne Street.

Yellow flowers—nothing more


Thursday, August 27, 2015

Man walks into a garage sale and buys a garage

Well, not really a garage, but a carport. The price was too low for me to refuse. The only catch was that I had to take it apart and move it that week.

Here's the carport as I found it.


It's bolted through the pavement. 


And here I am about to grind away one of the anchor bolts.


Joan and neighbor Stephen carefully removing the aluminum roof panels.


Two of the three minimum-wage workers.


Posing with the vehicle that I learned to hate: the world's longest truck with a bad transmission and scary brakes and sloppy steering. I glad it's safely back at the rental company.


By the way, U-Haul did not come close to meeting my minimum expectations.

Loading steel rafters onto my 3/8-ton pickup truck for their journey into the backyard.


Monday, August 17, 2015

Another tool

Some blacksmithing tools are made to fit into the square (tapered) hole on top of the anvil. This hole is the hardy hole. Regrettably, I did not have any of these tools. Here's what I created.


This device is a bending block for hot metal.


The screw  heads are counter bored so they won't touch the anvil top.


Steel bars and rods can be inserted between and around the tines and bent into curves.


I've already tried it and it works. It certainly meets my minimum expectations.

Wednesday, August 5, 2015

Backyard forge up and running . . . kinda

Grab some scaffolding, plywood, and Harbor Freight clamps and what do you get?


You get the Backyard Forge, a secluded five- by seven-foot space with a dirt floor and a plywood roof. Otherwise, it's open to the elements.

In this photo, the roof has not been installed.


This is a test of the entire setup. I needed a place out of the sun—not just because it's so hot, but because semi-darkness is required to see the colors of the steel. The forge (furnace) is at the upper right. The anvil, for what it's worth, is at the lower left.

The anvil was a mistake I made because of my fervor to learn blacksmithing.

Math lesson
Learn this equation: Craig's List + fervor = bad decision.


Below, I'm inserting a steel rod into the forge. This is much better than yesterday's bright, sunny, out-in-the-open location.


Bending the metal into a hook.


Sunday, August 2, 2015

Blacksmithing at the Goat Farm

A few more views of the picturesque Goat Farm property.


It's part of an old cotton gin factory . . .


. .  . and some buildings are covered with vines.


The ultimate storage solution


A student at one of the forges


After two evenings of basic instruction, I attempted a knife-making course at the Goat Farm. With only a 3-inch piece of 1/2" steel rod, I produced my first tool: a little Viking knife.


It meets my minimum expectations.

Thursday, July 30, 2015

I've been working on the railroad

Just another day on the Atlanta Beltline—or at least the proposed but incomplete part of the Beltline north of Memorial Drive.
Joan walks purposefully along the abandoned tracks, while I lag behind to study the mechanics of the old railroad track.


Sunday, July 26, 2015

Joan makes some tin can art

Tin can art
A few years ago, Joan and I spent a week at the John Campbell Folk School in North Carolina. We learned how to create art from tin cans and metal scraps.

Last week, Joan had a creative moment and made a present for me—a beautiful little iconic homage to Leonardo da Vinci.


This project involved distressing and rusting an Altoids tin and creating all the little things that fit inside the box, including foil, hardware cloth, gears, miniature art, chain, wire, and a pearl.

I think it's quite lovely.


Tuesday, February 25, 2014

Sewing (Making a quilt)

A few weeks ago, my friend Ashley came over to teach me how to sew. I’ve had a Singer sewing machine for about 10 years, but for some reason, it never quite worked—at least for me. I was fairly sure it was defective.

Alas, when Ashley was behind the wheel, it worked just fine. She showed me what to do, including:

  • threading (a fairly tedious process)
  • winding a bobbin (a necessary evil)
  • pulling the bobbin thread up from the dark recesses of the machine (this appears to be something magical)
  • sewing a straight stitch (“straight” is a cruel hoax. You set the machine for straight stitches, but they are never really straight)
  • sewing a zigzag stitch (I’m sticking with a straight stitch for a while)
  • back stitching at the beginning and end (something I enjoy because it proves the machine will do what I tell it to do)
  • adjusting the thread tension (something you don’t do unless there’s a good reason)

My first project was patching some blue jeans. It worked—but was not pretty. I wear them anyway.

Then I tried a small practice quilt using old, worn-out towels. I suggest never sewing old towels. This is an effective cat bed.
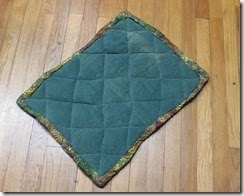
Small green quilt made of old green towels. Edges are irregular.

Now for the big quilt
The real first project was a quilt. Perhaps I was too ambitious when I planned a five-foot by seven-foot quilt, but I wanted it big enough to be useful.

I cut the six-inch squares one at a time until I got bored (after two squares), then tried to cut as many as I could with my super-sharp and super-dangerous rotary cutter. I found I could slice through a stack of 24 layers as long as I didn’t care too much about accuracy or the safety of my fingers.

This photo shows a stack of 24 squares near the middle of the batch.
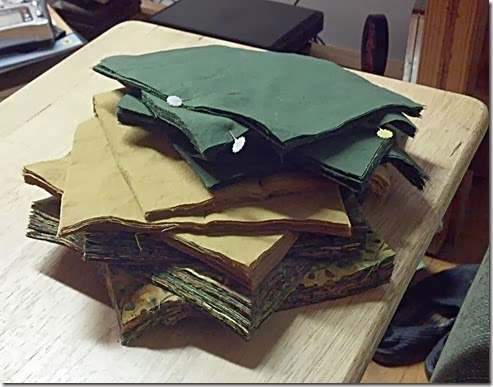
Various stacks of quilt squares, with at least one stack containing 24 layers of fabric.


I also used some workshop tools to hold everything in place while I cut.
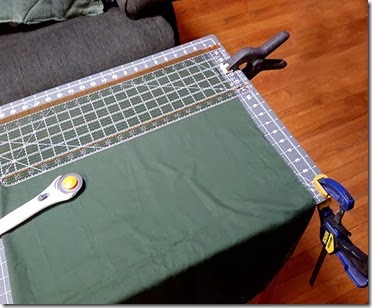
Fabric with cutting guides clamped to table with woodworking clamps.


It’s a quilt—it’s a quilt
Yes it’s really a quilt. The stitches are not as straight as they should be, and the corners of the squares don’t match as they should. But it has three layers (top, bottom, and batting), and it’s warm, and it looks great from across the room.

And it certainly meets my minimum expectations.
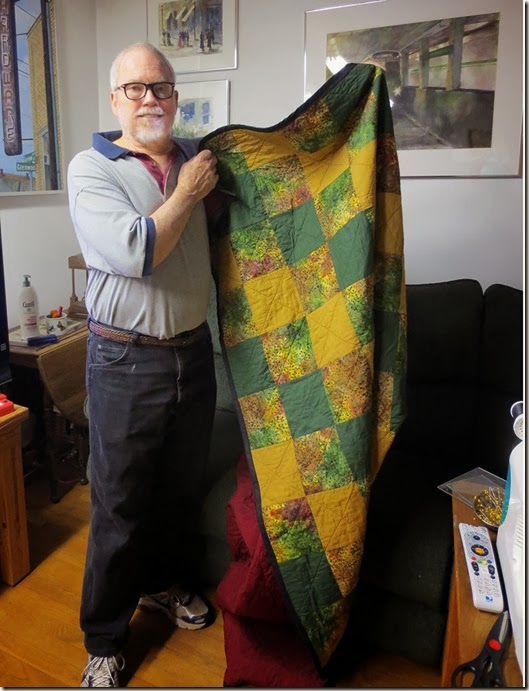
James holding quilt. Quilt comprises 6-inch squares of green, amber, and batik fabric, with maroon backing.


Next time: The Haunted School House